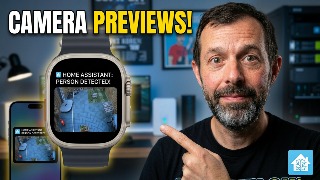
If you’re using security cameras with Home Assistant, one of the most useful automations you can create is receiving a notification with a camera thumbnail whenever motion is detected.
In this guide, I’ll show you how to configure camera thumbnail notifications in Home Assistant so that when motion is detected, you’ll receive an alert on your iPhone and Apple Watch complete with a snapshot image from your camera.
This setup works with virtually any camera integrated into Home Assistant and can dramatically improve your home security notifications.
What You’ll Need
Before getting started, you’ll need a few things configured in Home Assistant.
- A Motion Sensor (either built into your camera or a separate sensor)
- A camera integrated with Home Assistant
- The Home Assistant Mobile App configured on your phone
- Remote access configured via Home Assistant Cloud or Cloudflare Tunnels (recommended)
For this tutorial, I’m using the Reolink Atlas PT Ultra, which I’ve reviewed previously, but this method works with virtually any camera supported by Home Assistant.
What We’ll Be Creating
The goal is to create an automation that:
- Detects motion from a camera or sensor
- Takes a Camera Snapshot
- Sends a notification to your phone
- Includes a thumbnail image in the notification
- Displays the alert on your Apple Watch as well as your iPhone
Step 1: Create a New Automation
In Home Assistant, navigate to:
- Settings
- Automations & Scenes
- Create Automation
Create a new automation and configure the trigger.
Step 2: Configure the Motion Trigger
For the When section, select your Motion Sensor.
One of the advantages of the Reolink Atlas PT Ultra is that it exposes multiple detection sensors, allowing you to trigger notifications based on specific object types, including:
- Person detection
- Animal detection
- Vehicle detection
For this example, I’m using the person detection sensor.
If your camera only exposes a standard motion sensor, simply select that instead.
You could also use object recognition systems such as DOODS to filter notifications by object type, although that requires additional setup.
If you’d like to see a tutorial covering object recognition in Home Assistant, let me know in the comments.
Step 3: Prevent Notification Spam
Next, add an And If condition using a template.
This template checks whether the automation has already run within the previous 30 seconds, preventing repeated notifications when continuous motion is detected.
{{as_timestamp(now()) - as_timestamp(state_attr('automation.human_garden_detected', 'last_triggered'), 0) > 30}}
You’ll need to replace:
- automation.human_garden_detected with the entity ID of your own automation
- 30 with the number of seconds you want between notifications
You may also wish to add additional conditions, such as only sending notifications when nobody is home.
Step 4: Capture a Camera Snapshot
Under Then Do, add a Take Camera Snapshot action.
Select your camera entity and configure the filename.
For example:
- /media/human.jpg
You can choose any filename or create subfolders if you prefer.
Step 5: Send the Mobile Notification
Add a second action:
- Send Notification via Mobile App
Select the mobile device associated with your phone.
Add whatever notification title and message you’d like.
Then add the following data field:
- image: /media/local/human.jpg
Notice the use of /media/local/. This allows Home Assistant to expose the image publicly while referencing the same file saved in the previous step.
Step 6: Save and Test the Automation
Finally:
- Save the automation
- Give it a memorable name
- Select Run Actions to test it
If everything is configured correctly, you’ll receive a push notification on your iPhone containing the camera thumbnail image, and the notification will also appear on your Apple Watch.
Prefer to Copy and Paste the Configuration?
If you’d rather not build the automation manually through the Home Assistant interface, I’ve published the complete configuration and template examples in my Camera Thumbnail Notifications Tutorial (GitHub).
The guide includes the automation template used in this tutorial, along with the notification configuration and anti-spam timing check, making it easy to copy, customise and import into your own Home Assistant installation.
Advanced Options
Once you’ve got basic thumbnail notifications working, you can expand the automation further by:
- Only sending notifications when you’re away from home
- Using object recognition with DOODS
- Creating different notifications for people, animals and vehicles
- Adding actionable notification buttons
- Including camera streams or clips
- Sending notifications to multiple users
Final Thoughts
Camera thumbnail notifications are one of the most useful automations you can create in Home Assistant. They provide instant visual context for motion events and make it much easier to determine whether you need to take action.
With just a camera, a Motion Sensor and the Home Assistant Mobile App, you can create a professional-quality notification system that works seamlessly across your iPhone and Apple Watch.
Useful Links
- Camera Thumbnail Notifications Tutorial (GitHub)
If you found this guide useful, be sure to check out more Home Assistant tutorials, smart home automation guides and product reviews.
